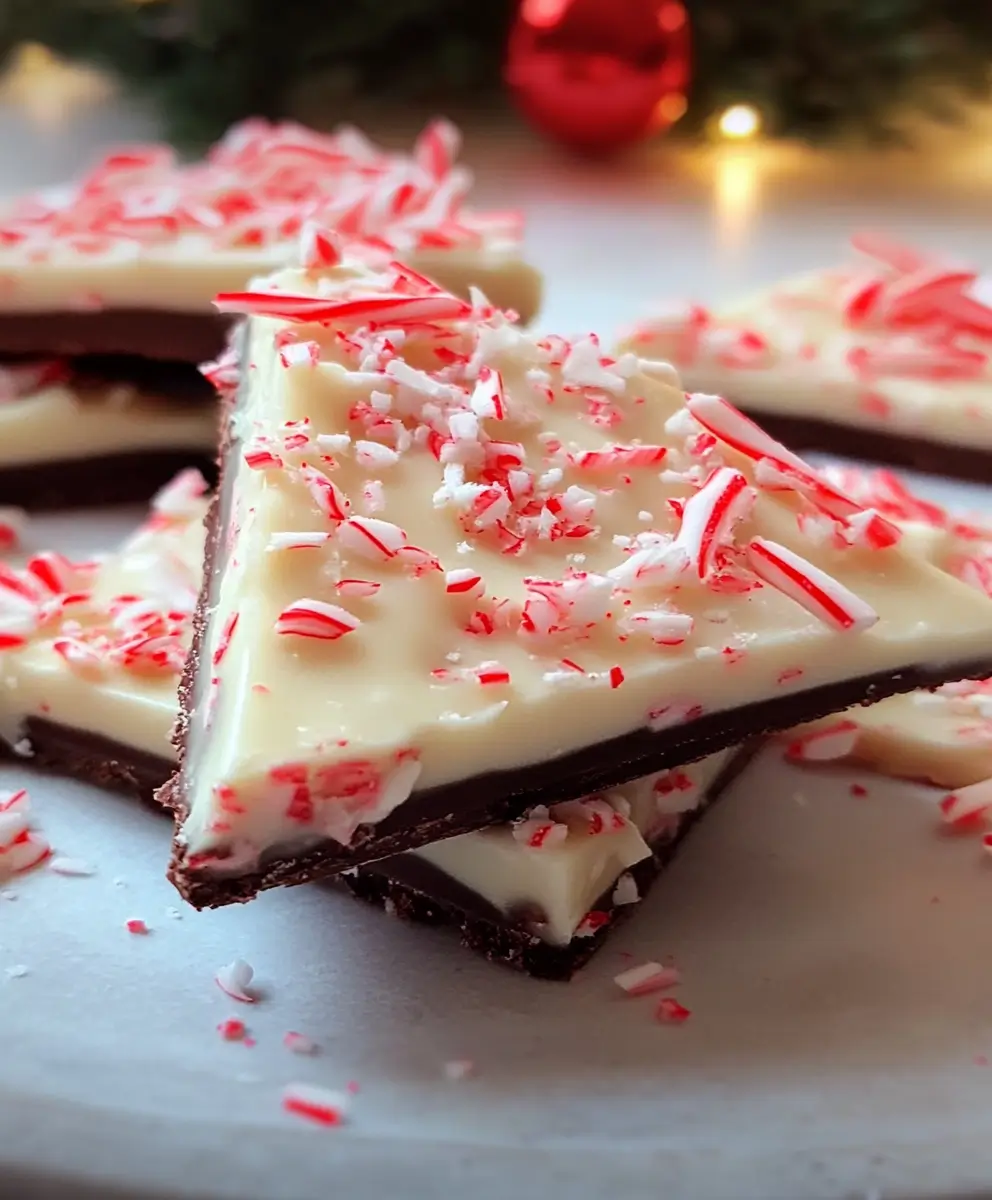
Homemade Peppermint Bark is one of the simplest and most delightful treats you can make during the holidays. Combining rich layers of chocolate with the cool crunch of peppermint, this no-bake recipe is perfect for gifting or indulging in yourself. If you’ve ever thought of buying it, you’ll be thrilled to discover how easy it is to create your own at home.
Unlike store-bought versions, homemade peppermint bark gives you complete control over ingredients and quality. Using high-quality chocolates and peppermint extract makes a world of difference. For tips on choosing the best ingredients, consider checking out this guide on white chocolate with cocoa butter. Properly selected ingredients ensure that your bark has the perfect texture and taste.
Mastering the art of melting chocolate is key to making the perfect bark. If you’re unsure about the best melting methods, this handy tutorial on how to melt chocolate properly will help you avoid burning or seizing your chocolate.
Table of contents
Ingredients for Easy Peppermint Bark
Gather these simple ingredients to get started:
- Dark Chocolate – Choose 60% cocoa or higher for a rich flavor.
- White Chocolate – Use a bar of premium white chocolate with cocoa butter.
- Peppermint Extract – Not to be confused with mint extract.
- Candy Canes – Crushed for a festive topping and texture.
Optional Add-Ins:
- Chopped nuts like almonds or hazelnuts.
- Pretzels for a salty twist.
- Festive sprinkles for added flair.
Tools You’ll Need
- Microwave or Double Boiler – For melting chocolate.
- 8×8 Baking Pan – Ideal size for thicker bark.
- Wax Paper or Parchment Paper – Prevents sticking.
- Spatula – For spreading chocolate smoothly.
- Rolling Pin – For crushing candy canes easily.
Step-by-Step Instructions
1. Melt the Dark Chocolate
- Place dark chocolate pieces in a microwave-safe bowl.
- Heat in 30-second intervals, stirring after each session.
- Once melted, stir in ¼ teaspoon of peppermint extract.

2. Prepare the White Chocolate
- Melt white chocolate similarly in a separate bowl.
- Stir in the remaining peppermint extract.
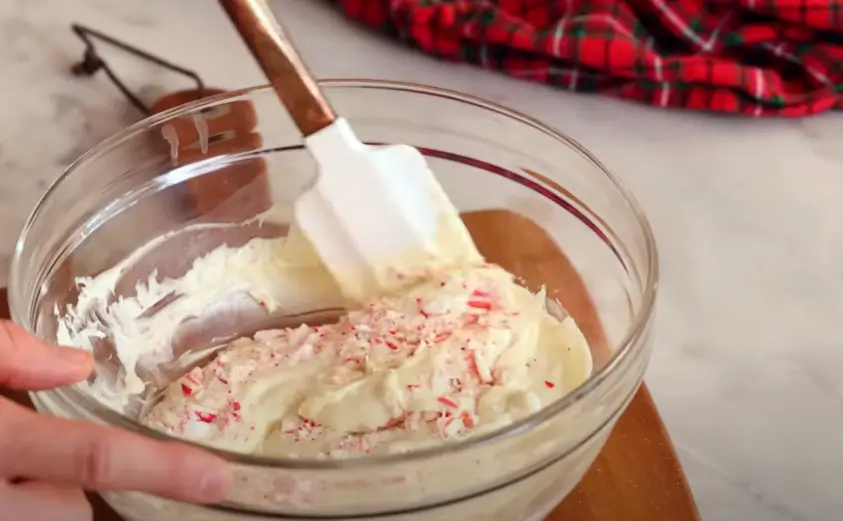
- Gently fold in ¼ cup of crushed candy canes for texture.
3. Layer the Chocolates
- Pour the melted dark chocolate into a lined baking pan and spread evenly.
- Gently pour the white chocolate over the dark layer, spreading carefully.
4. Add the Peppermint Topping
- Sprinkle the remaining crushed candy canes over the white chocolate layer.
5. Cool and Break
- Allow the bark to cool at room temperature for a few hours.
- Once set, break into pieces by hand for a rustic look.
Pro Tips for Perfect Homemade Peppermint Bark
Creating perfect homemade peppermint bark requires attention to detail and a few clever techniques to ensure your treat turns out beautifully every time. Here are some essential tips to help you avoid common pitfalls and elevate your peppermint bark game.
1. Don’t Over-Mix the Candy Canes in the White Chocolate
When you add crushed candy canes to the melted white chocolate, be careful not to over-mix. The heat from the chocolate can quickly melt the peppermint pieces, causing them to lose their crunch and bleed red stripes throughout the white chocolate. To avoid this:
- Gently fold in the crushed candy canes with a spatula, making just a few quick stirs.
- Add the candy canes right before spreading the white chocolate over the dark chocolate layer.
- Ensure the candy canes are evenly distributed without prolonged mixing.
This will help retain the crunchy texture and keep the colors vibrant for that classic peppermint bark look.

2. Avoid Refrigerating During Cooling
It might be tempting to speed up the cooling process by putting the bark in the refrigerator, but this can lead to layer separation and condensation issues. The sudden drop in temperature causes the chocolates to contract at different rates, making the layers more likely to pull apart. To prevent this:
- Allow the bark to cool at room temperature for several hours, ensuring the layers set gradually.
- Choose a cool, dry spot away from direct sunlight or heat sources.
- If you’re in a hurry, you can place the bark in a cooler room rather than the refrigerator.
This method ensures a firm, cohesive texture and prevents moisture from affecting the chocolate’s smooth finish and the peppermint topping.
3. If Layers Separate, Re-Melt and Swirl
Sometimes, despite your best efforts, the dark chocolate and white chocolate layers may still separate. Don’t worry—this is fixable! Here’s what to do:
- Gently re-melt the separated layers in a microwave or using a double boiler on low heat.
- Once the chocolate is melted, pour it back into the baking pan.
- Use a spatula or a toothpick to swirl the layers together, creating a marbled effect.
- Let the bark set again at room temperature.
This technique not only saves your batch but also creates a beautiful swirled design that adds visual interest and makes each piece unique.
4. Use High-Quality Chocolate for Best Results
The quality of the chocolate you use directly impacts the taste and texture of your peppermint bark. To achieve a professional result:
- Opt for premium dark chocolate with at least 60% cocoa content for a rich, intense flavor.
- Choose white chocolate with real cocoa butter instead of chocolate chips, which often contain stabilizers that prevent smooth melting.
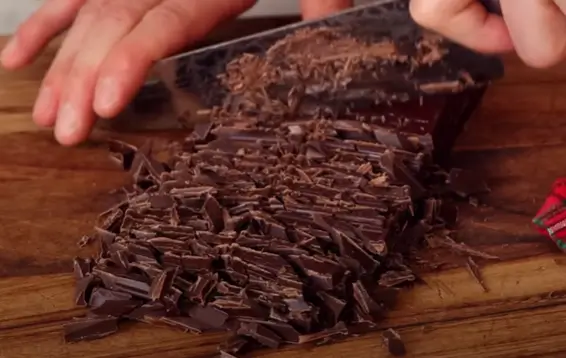
- Chop the chocolate into small, even pieces before melting to ensure it melts uniformly and smoothly.
Using quality ingredients ensures your homemade peppermint bark has the perfect balance of flavor, texture, and melt-in-your-mouth goodness.
5. Achieve Even Layers for a Polished Look
To create even, professional-looking layers in your peppermint bark:
- Pour the melted dark chocolate into the baking pan first and spread it evenly using a spatula.
- Tap the pan gently on the counter to release air bubbles and level the chocolate.
- Wait until the dark chocolate is semi-set—firm but still slightly tacky—before adding the white chocolate layer.
- Spread the white chocolate carefully over the dark chocolate, using smooth, even strokes to cover the entire surface.
Taking your time with these steps helps you achieve clean, defined layers that look as good as they taste.
6. Crush Candy Canes to the Right Size
The size of the crushed candy canes affects both the texture and appearance of your bark. For the best results:
- Place the candy canes in a ziplock bag and use a rolling pin to crush them.
- Aim for a mix of fine dust and small, chunky pieces to add variety in texture.
- Avoid crushing them too finely, as the peppermint dust can melt into the chocolate and affect the bark’s crunchiness.
This combination of sizes ensures that each bite has a satisfying peppermint crunch while maintaining a festive look.
7. Store Your Peppermint Bark Properly
Proper storage is key to keeping your peppermint bark fresh and delicious. Follow these tips:
- Store in an airtight container to prevent moisture and air from affecting the chocolate.
- Keep the container in a cool, dark place at room temperature.
- If layering pieces of bark, place a sheet of wax paper between each layer to prevent sticking.
Well-stored peppermint bark can stay fresh for up to 2 weeks, making it perfect for holiday gifting.
8. Add a Decorative Touch
For a more festive appearance, consider adding decorative elements to your peppermint bark:
- Drizzle melted dark chocolate, white chocolate, or red-tinted chocolate on top of the bark.
- Sprinkle with edible glitter or holiday-themed sprinkles before the chocolate sets.
- Add a light dusting of crushed peppermint dust for a finishing touch.
These little extras make your homemade peppermint bark stand out and give it a professional, gourmet look.
By following these pro tips, you’ll create Easy Peppermint Bark that’s not only delicious but also visually stunning. Whether you’re making it for gifts, parties, or your own enjoyment, these techniques will ensure your peppermint bark is a holiday masterpiece!
Delicious Variations
- All Dark Chocolate Bark – Skip the white chocolate for a richer flavor.
- All White Chocolate Bark – For a sweeter version.
- Swirled Bark – Pour both chocolates simultaneously and swirl with a toothpick.
- Add-Ins – Mix in chopped nuts, pretzels, or sprinkles for a unique twist.
Storing Your Homemade Peppermint Bark
- Store in an airtight container at room temperature.
- Avoid refrigeration to prevent condensation.
- Stays fresh for up to 2 weeks, making it perfect for gifting.
More Ideas for Easy Peppermint Bark
1. Create Peppermint Bark Gift Sets
Assemble themed gift sets by pairing Easy Peppermint Bark with hot cocoa mix, festive mugs, and marshmallows. Wrap everything in a decorative box or basket for a complete, cozy holiday gift.
2. Layered Bark with Different Flavors
Experiment with multiple layers by adding flavored chocolates like dark chocolate, milk chocolate, and white chocolate. Add a thin layer of caramel or peanut butter between the chocolate layers for an extra burst of flavor.
3. Peppermint Bark Truffles
Roll pieces of Easy Peppermint Bark into truffles. Dip them in melted dark chocolate and sprinkle with crushed candy canes. These bite-sized treats are perfect for holiday platters.
4. Festive Shapes with Cookie Cutters
Instead of breaking the bark into random pieces, pour the chocolate into holiday-themed cookie cutters. Shapes like stars, Christmas trees, and snowflakes make your bark extra festive and great for gifting.
5. Peppermint Bark Topped Desserts
Use crushed peppermint bark as a topping for desserts like brownies, cupcakes, ice cream sundaes, or cheesecakes. This adds a festive touch and a delicious peppermint crunch.
6. Add a Chocolate Drizzle
After your bark sets, drizzle melted dark, milk, or white chocolate over the top for an elegant finish. This simple addition creates a more visually appealing and gourmet look.
7. Incorporate Different Types of Peppermint Candies
Mix it up by using different peppermint candies like peppermint patties, red and white peppermint discs, or peppermint-filled chocolates to add variety in texture and flavor.
8. Spiced Peppermint Bark
Add a hint of spice by mixing in a pinch of cinnamon, nutmeg, or ginger to the white chocolate layer. This creates a warm, festive flavor perfect for the holidays.
9. Sea Salt Caramel Peppermint Bark
Drizzle a layer of sea salt caramel between the dark and white chocolate layers. Sprinkle a bit of flaky sea salt on top for a sophisticated sweet-and-salty combination.
10. DIY Peppermint Bark Kits
Create DIY kits for friends and family. Include pre-measured ingredients like dark chocolate, white chocolate, peppermint extract, and candy canes, along with instructions. These kits make thoughtful and interactive gifts.
11. Festive Peppermint Bark Lollipops
Pour the melted chocolate layers onto lollipop sticks to create peppermint bark lollipops. Perfect for kids’ parties or as stocking stuffers.
12. Peppermint Bark Ice Cream Mix-In
Chop up Easy Peppermint Bark and mix it into vanilla or chocolate ice cream for a festive frozen treat. The peppermint and chocolate pieces add a delightful crunch.
13. Add Edible Glitter for Sparkle
Sprinkle edible glitter or gold dust over the finished bark for a touch of sparkle. This makes the bark look even more festive and elegant for holiday celebrations.
14. Make a Peppermint Bark Charcuterie Board
Combine peppermint bark with other holiday sweets like chocolate truffles, cookies, and candy canes on a festive charcuterie board for parties or gatherings.
15. Dip Pieces in Chocolate
For an extra layer of decadence, dip pieces of Easy Peppermint Bark in melted dark chocolate. Let them set on parchment paper for a double-chocolate treat.
How Long Does Peppermint Bark Stay Fresh?
Easy Peppermint Bark stays fresh for up to 2 weeks when stored properly. To maintain its quality, store it in an airtight container at room temperature in a cool, dark place. This prevents the chocolate from melting or becoming discolored and keeps the peppermint topping crunchy. Avoid humidity, as moisture can make the candy canes sticky. Properly stored, your homemade peppermint bark remains a delicious treat for gifting or snacking throughout the holiday season.
Why Do My Peppermint Bark Layers Separate?
The layers can separate if the dark chocolate layer sets completely before adding the white chocolate layer. To avoid this, ensure the dark chocolate is semi-set but still slightly soft when you pour on the white chocolate. Also, avoid refrigerating between layers, as sudden temperature changes can cause the layers to contract and separate. If separation occurs, gently re-melt the chocolate layers and swirl them together before letting it set again.
What’s the Best Way to Crush Candy Canes for Easy Peppermint Bark?
To crush candy canes easily and mess-free, place them in a ziplock bag and use a rolling pin to break them into small pieces. This method keeps the candy dust contained and lets you control the size of the pieces. For a finer texture, roll over the bag multiple times; for larger, crunchier bits, gently tap the bag. Crushed candy canes add the signature peppermint crunch that makes Easy Peppermint Bark so festive.
Can I Use Milk Chocolate Instead of Dark Chocolate?
Yes, you can substitute milk chocolate for dark chocolate in your Easy Peppermint Bark recipe. Milk chocolate provides a sweeter, creamier taste that pairs well with the peppermint flavor. However, milk chocolate is softer than dark chocolate, so ensure you let each layer set properly before adding the next one. This prevents the layers from mixing or separating.
What Type of White Chocolate Works Best?
For the best results, use white chocolate that contains cocoa butter. High-quality white chocolate melts smoothly and sets firmly, giving your peppermint bark a better texture. Avoid white chocolate chips, as they often contain additives that prevent them from melting properly. If you need help choosing, check out this guide on white chocolate with cocoa butter.
How Can I Prevent My Peppermint Bark from Melting?
To keep your Easy Peppermint Bark from melting, store it in a cool, dark place away from direct sunlight or heat sources. Avoid leaving it in warm areas like the kitchen counter near the oven. If you’re transporting the bark, consider placing it in a cooler with an ice pack to maintain its structure. Proper storage helps the chocolate stay firm and the peppermint topping remain crunchy.
Why Did My White Chocolate Seize While Melting?
White chocolate can seize if it comes into contact with even a small amount of water. To avoid this, use a dry bowl and utensils when melting the white chocolate. Melt it in short intervals and stir regularly. If it seizes, try adding a small amount of vegetable oil or cocoa butter to smooth it out. Mastering the art of how to melt chocolate properly will help you achieve a smooth, flawless texture.
How Do I Get Perfectly Even Layers in My Peppermint Bark?
To achieve even layers in your Easy Peppermint Bark, make sure each layer is spread smoothly and evenly with a spatula. Gently tap the baking pan on the counter to level the chocolate. Allow the dark chocolate to become semi-set before adding the white chocolate layer, ensuring a seamless bond between layers.
These FAQs will help you create, store, and customize the perfect Easy Peppermint Bark for the holidays!
Now you’re ready to make the ultimate Homemade Peppermint Bark. With quality ingredients and the right techniques, your homemade version will shine this holiday season!

